Around a year ago, I decided to try using the Colemak keyboard layout. It is an alternative to the standard QWERTY layout that is supposed to be faster to type with, and has better hand ergonomics. QWERTY is a very old keyboard layout that was designed for old typewriters, and as such the positioning of keys is less than ideal. Colemak is designed for modern keyboards, and positions keys to minimize the distance travelled by fingers. Unlike some other layouts (such as Dvorak), Colemak isn’t completely different from QWERTY. Common keyboard shortcuts like CTRL-C, CTRL-V, CTRL-X, CTRL-A are kept in the same place, the bottom row is almost entirely unchanged, most keys are typed with the same hand as QWERTY, and many keys aren’t even moved at all. This gives the benefits of a better keyboard layout while minimizing the amount that needs to be relearned from scratch.
Setting up for Colemak
Most operating systems have support for Colemak built in. Some notes:
- The Debian 10 installer doesn’t have an option in the installer but you can change it once installed
- GNOME and Plasma both support Colemak
- ChromeOS supports Colemak, and even allows remapping the search key to backspace
- Windows doesn’t have Colemak support built in, you have to QWERTY your way through the setup process, then install Colemak from the Internet :(
Learning Colemak
While I was able to type fairly fast with QWERTY, I never learned to touch type the “proper” way. I just kinda let my fingers sprawl across the keyboard, and my fingers didn’t return the home row. I was forced to learn to properly touch type with Colemak, since I couldn’t look at the keyboard while typing – the letters on the keyboard were unrelated to the actual letters they typed!
It took me a few months to be able to type in Colemak at my former QWERTY speeds. I initially used Colemak Academy to learn a few keys at a time. Once I was able to type with the whole keyboard (albeit very slowly), I used Monkeytype to improve my speed and accuracy. When I was ready, I stopped using QWERTY entirely, and used just Colemak for all of my typing. This was rough at first, due to my slowness. Having all of my typing being significantly slower felt bad at first, but in a few weeks I was able to type at a normal pace again.
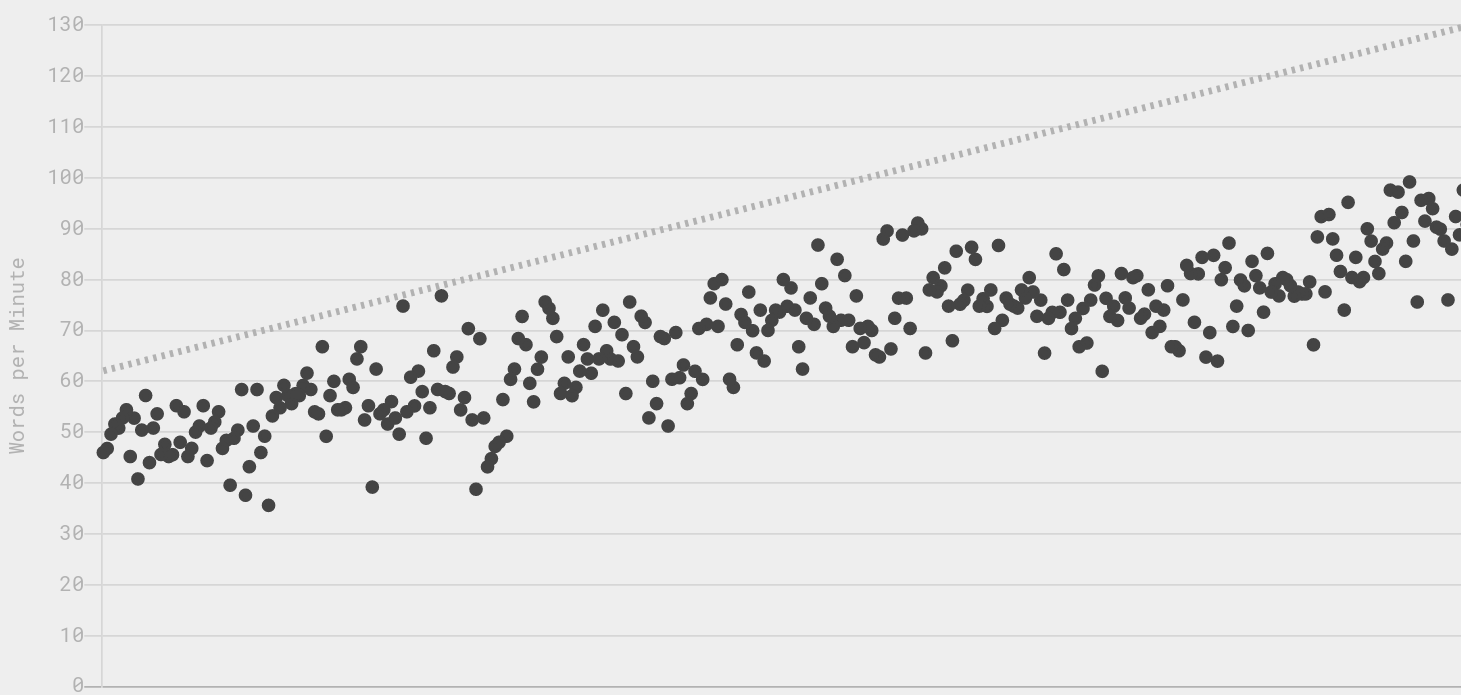
2 months of typing practice, from around when I switched to Colemak full time
Using Colemak
Once I got good at typing with Colemak, it felt better for me to type. Sometimes when I am typing it feels like I am doing an intricate dance with a keyboard, a feeling I never got with QWERTY. It feels very nice to type with Colemak.
One annoying thing with Colemak is that it isn’t QWERTY, and how applications handle keyboard shortcuts can vary quite a bit, since the logical key layout (Colemak) differs from the scancodes reported from the keyboard (which are in QWERTY). Most just use logical key pressed – if you want to save in Blender, enter CTRL+(whatever key corresponds to S). But some applications use the physical key pressed – to save in VSCodium, you enter CTRL+(the physical key labelled with S). This mismatch between applications often leads to confusion for me. This is especially annoying when using the applications through a VM layer that remaps scancodes. So when I am using VSCodium normally, it is based on physical keys, but when I am using it through Crostini, it is based on logical keys.
That being said, I have quite enjoyed using Colemak. If you can handle having slowed typing for a few months, I would recommend learning Colemak. It is an investment in your future.
